📌 Key Takeaways
- Prepare your app carefully by meeting Apple’s App Store guidelines before submission.
- Set up App Store Connect with accurate app details, screenshots, metadata, and pricing information.
- Test your app thoroughly to fix bugs and ensure a smooth user experience before publishing.
- Submit your app for Apple’s review and address any feedback promptly if revisions are requested.
- Maintain and update your app regularly with new features, performance improvements, and security updates to keep users engaged.
Launching an iPhone app is an exciting milestone, but building the app is only part of the journey. To make your application available to millions of iPhone and iPad users worldwide, you need to complete Apple’s official App Store submission process. Understanding how to upload app on App Store correctly can save you time, prevent common errors, and improve your chances of getting approved on the first attempt.
Apple has strict quality, security, and performance standards to ensure users receive reliable and secure applications. Whether you’re launching a startup app, a business application, or an enterprise solution, following Apple’s submission guidelines is essential for successful iOS app publishing.
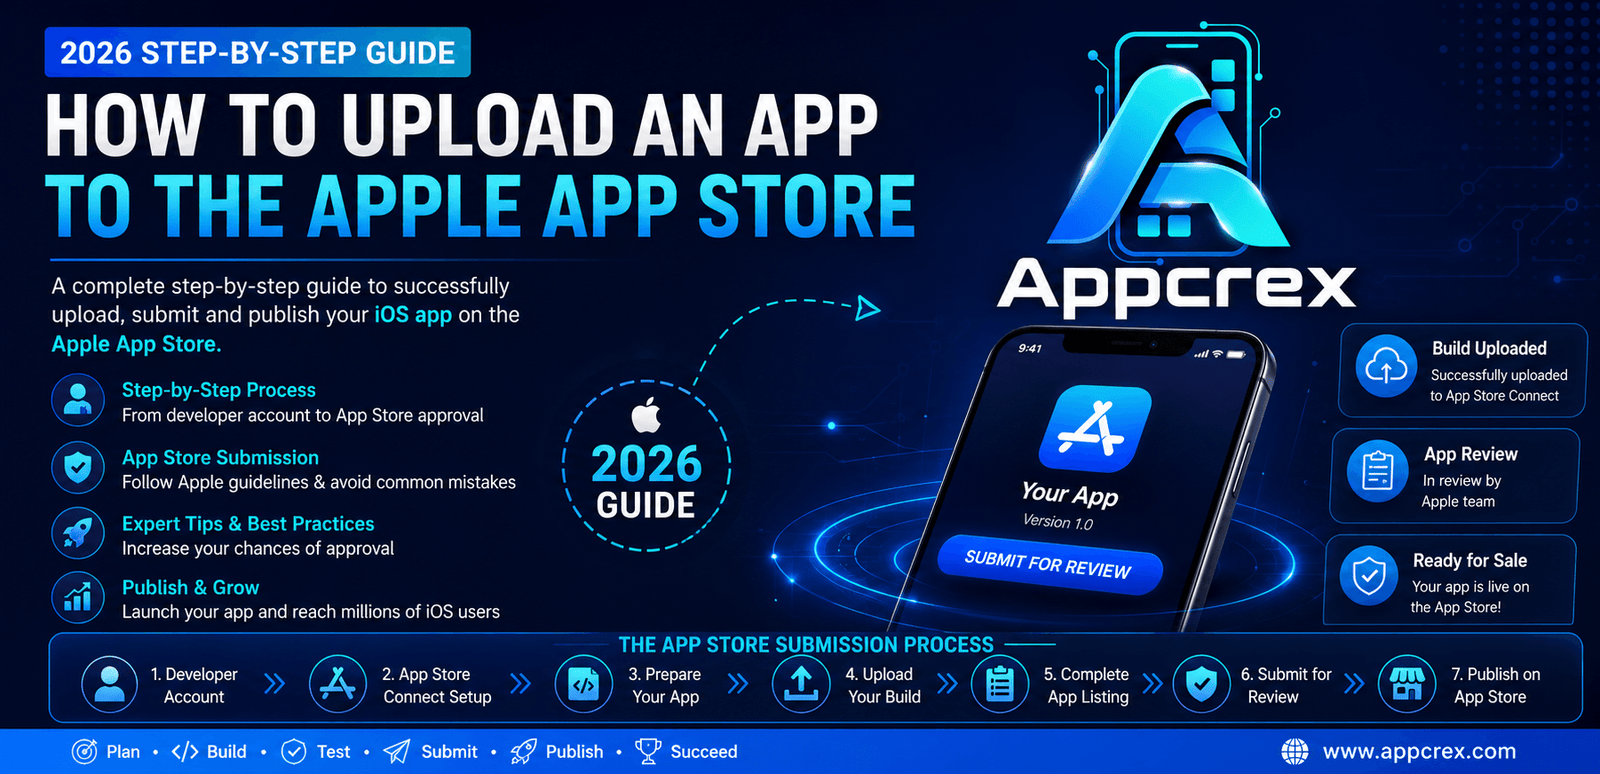
If you’re wondering how to upload app on App Store, this comprehensive guide walks you through every step—from creating an Apple Developer account and preparing your app to completing the App Store submission, uploading your build through Xcode, and successfully publishing your application.
Whether you’re an independent developer or working with an experienced app development company or iPhone app development company, this guide will help simplify the submission process.
Why Publish Your App on the Apple App Store?
The Apple App Store is one of the world’s largest digital marketplaces, giving businesses and developers access to millions of active iPhone and iPad users. Successfully choosing to publish app on App Store not only increases your app’s visibility but also helps establish trust and credibility with users.
Here are some of the biggest advantages of publishing your app on Apple’s platform.
Reach Millions of iPhone Users
Apple has a loyal global user base that actively downloads apps for productivity, shopping, healthcare, education, finance, entertainment, travel, and business. Uploading your app allows you to reach customers in multiple countries through a single platform.
For businesses looking to expand internationally, the App Store provides an excellent opportunity to attract new users and grow brand awareness.
Build Trust and Credibility
Apple carefully reviews every application before it becomes available to users. This review process helps maintain high-quality standards and gives customers confidence when downloading apps.
Completing a successful App Store submission demonstrates that your application meets Apple’s guidelines for security, privacy, and performance.
Better Revenue Opportunities
The App Store offers several monetization options, including:
- Paid app downloads
- In-app purchases
- Subscription models
- Premium feature unlocks
- Advertising integrations
Businesses can choose the monetization strategy that best aligns with their goals while reaching customers who are comfortable making digital purchases.
Strong Security Standards
Apple is known for its strong focus on user privacy and security. Apps published on the App Store benefit from a trusted ecosystem that protects user data and encourages safer digital experiences.
By following Apple’s development and privacy requirements, businesses can build greater customer confidence and strengthen their brand reputation.
Increase Business Visibility
Publishing your app helps your business establish a stronger digital presence. A professionally developed mobile application can improve customer engagement, increase brand recognition, and provide a convenient way for users to interact with your products or services.
Whether you operate an eCommerce store, healthcare platform, financial service, or logistics company, a mobile app can become a valuable extension of your business.
Prerequisites Before Uploading Your App
Before you upload app to Apple App Store, it’s important to make sure everything is prepared. Having all the required assets and accounts ready will help you avoid delays during the submission process.
Below is a checklist of the essentials.
1. Apple Developer Account
You must be enrolled in the Apple Developer Program before you can publish an app on the App Store.
2. Mac Computer
Since Xcode is only available for macOS, you’ll need access to a Mac to build, archive, and upload your application.
3. Latest Version of Xcode
Always use the latest stable version of Xcode to ensure compatibility with Apple’s current SDKs and submission requirements.
4. Unique Bundle Identifier
Every iOS application requires a unique Bundle ID that identifies your app within Apple’s ecosystem.
5. App Icons
Prepare high-resolution app icons that comply with Apple’s design specifications.
6. App Screenshots
You’ll need screenshots for various iPhone and iPad screen sizes. High-quality visuals help users understand your application’s features and improve conversion rates.
7. App Description
Create an informative and engaging app description that explains your application’s features, benefits, and functionality.
8. Keywords
Research relevant keywords to improve your app’s visibility in App Store search results.
9. Privacy Policy
Apple requires most applications to include a Privacy Policy URL explaining how user information is collected, stored, and used.
10. Support URL
Provide a support page where users can contact your business if they need assistance.
11. Marketing Website (Optional)
Adding your company’s website can strengthen your brand and provide users with additional information about your products or services.
12. Thorough Testing
Before beginning the App Store submission, thoroughly test your application to ensure it is stable, responsive, and free from major bugs or crashes.
Step 1: Join the Apple Developer Program
The first step in iOS app publishing is enrolling in Apple’s Developer Program. Without an active developer account, you cannot distribute applications through the App Store.
Visit the Apple Developer Website
Start by visiting Apple’s Developer portal and signing in with your Apple ID.
If you don’t already have an Apple ID, create one before beginning the enrollment process.
Choose the Right Account Type
Apple offers two primary enrollment options:
Individual Account
Ideal for freelancers, independent developers, and personal projects.
Organization Account
Recommended for companies and businesses that want to publish applications under their organization name. This option also allows multiple team members to collaborate on app development and management.
Complete Verification
During enrollment, Apple verifies your identity or business information. Organizations may be asked to provide legal documentation and business registration details.
Once verification is complete and your membership is activated, you’ll gain access to:
- App Store Connect
- Certificates and Profiles
- TestFlight
- Analytics
- Beta Testing
- App Submission Tools
Pay the Annual Membership Fee
The Apple Developer Program requires an annual subscription fee. After your membership is approved, you’ll be able to create applications and begin the App Store submission process.
Tips Before Moving to the Next Step
Before preparing your app for submission, make sure you have:
- Active Apple Developer membership
- Latest Xcode installed
- Stable app build
- Unique Bundle ID
- App icon and launch screen
- High-quality screenshots
- App description and keywords
- Privacy Policy URL
- Support website
- Thoroughly tested application
Completing these preparations will make the remaining submission process much smoother and reduce the likelihood of delays or rejection.
Step 2: Prepare Your App for App Store Submission
Before you upload app to Apple App Store, it’s essential to ensure your application meets Apple’s quality standards. Apple evaluates every app for performance, usability, security, and compliance with the App Store Review Guidelines, so taking time to prepare your app can significantly improve your chances of approval.
Whether you’re handling the process yourself or working with an app development company, a well-prepared app reduces delays and minimizes the risk of rejection.
Test Your Application Thoroughly
Start by testing your app on multiple iPhone and iPad devices, as well as different iOS versions if supported. Pay close attention to:
- App launch speed
- Navigation and user flow
- Login and registration
- Payment functionality (if applicable)
- Push notifications
- API integrations
- Offline functionality
- Device compatibility
Every feature should work as intended before submission.
Fix Bugs and Improve Performance
Apple expects apps to be stable and responsive. Before submitting your build:
- Resolve crashes and freezes
- Fix broken links
- Remove unused code
- Optimize memory usage
- Improve loading times
- Ensure smooth animations and transitions
A stable application provides a better user experience and increases the likelihood of passing Apple’s review.
Review Apple’s App Store Guidelines
Before beginning the App Store submission, review Apple’s latest guidelines to ensure your app complies with requirements related to:
- User privacy
- Security
- Content policies
- Intellectual property
- Design standards
- In-app purchases
- Advertising
Ignoring these guidelines is one of the most common reasons for app rejection.
Test with TestFlight
Apple’s TestFlight platform allows developers to distribute beta versions of their app to testers before release.
Testing with real users helps you:
- Identify usability issues
- Detect bugs
- Improve performance
- Gather valuable feedback
- Validate new features
Running a beta test before submission is considered a best practice for iOS app publishing.
Step 3: Configure App Store Connect
Once your application is ready, the next step is setting up your app in App Store Connect, Apple’s platform for managing applications, releases, analytics, and updates.
Create a New App
After logging into App Store Connect:
- Navigate to My Apps
- Click the “+” icon
- Select New App
- Enter the required information
You’ll be asked to provide:
- App Name
- Primary Language
- Bundle ID
- SKU (unique internal identifier)
- Platform (iOS)
Ensure the Bundle ID matches the one configured in Xcode.
Configure Pricing and Availability
Next, choose:
- Pricing model (Free or Paid)
- Countries and regions where your app will be available
- Release options
If you’re planning an international launch, App Store Connect allows you to publish your app in multiple markets simultaneously.
Add Version Information
For each release, you’ll need to provide:
- Version Number
- Release Notes
- App Description
- Keywords
- Promotional Text
- Support Information
Accurate metadata improves discoverability and provides users with clear information about your application.
Step 4: Create Certificates & Provisioning Profiles
Apple uses certificates and provisioning profiles to verify your identity and ensure only authorized developers distribute apps through the App Store.
Although newer versions of Xcode simplify much of this process through automatic signing, understanding these components is still important.
Distribution Certificate
A distribution certificate confirms that you are an authorized Apple Developer and allows your app to be signed for App Store distribution.
Without a valid certificate, you won’t be able to complete the App Store submission process.
Provisioning Profile
A provisioning profile connects your:
- App
- Bundle ID
- Distribution Certificate
- Apple Developer Account
This ensures your application can be securely distributed through Apple’s ecosystem.
Enable Automatic Signing
For most developers, Xcode’s Automatically Manage Signing option is the easiest approach.
Automatic signing:
- Creates certificates
- Manages provisioning profiles
- Reduces configuration errors
- Simplifies deployment
This feature is especially helpful for beginners learning how to upload app on App Store.
Step 5: Archive Your App Using Xcode
Once development and testing are complete, it’s time to generate the production build you’ll submit to Apple.
Open Your Project
Launch Xcode and open your completed project.
Verify that:
- The correct Bundle ID is selected.
- Version number is updated.
- Build number is correct.
- Release configuration is selected.
Select Any iOS Device
Before archiving, choose Any iOS Device (arm64) or a generic iOS device as the build target.
This prepares Xcode to create an archive suitable for App Store distribution.
Archive the Application
From the Xcode menu:
Product → Archive
Xcode will begin compiling and packaging your application.
Depending on the project’s size, this process may take several minutes.
Validate the Build
After the archive is complete, Xcode opens the Organizer window.
Select your archive and click:
Validate App
Validation checks for:
- Missing assets
- Signing issues
- Configuration errors
- Invalid settings
- Packaging problems
Resolving validation errors before uploading helps prevent submission failures.
Upload the Build
Once validation succeeds:
- Select Distribute App
- Choose App Store Connect
- Select Upload
- Follow the on-screen instructions
- Confirm signing options
- Begin upload
Xcode securely transfers your application to Apple’s servers.
After the upload is complete, the build will appear in App Store Connect after Apple’s processing finishes. This may take a few minutes to an hour, depending on server load.
Best Practices Before Uploading
Before moving to the next stage, double-check the following:
- App functions correctly on supported devices
- No crashes or major bugs
- Bundle ID matches App Store Connect
- Certificates are valid
- Provisioning profiles are correct
- Version number is updated
- Build number is incremented
- App icon is included
- Required permissions are configured
- Privacy Policy is ready
Taking a few extra minutes to verify these details can save hours of troubleshooting later.
Step 6: Upload App to Apple App Store
Once your app has been archived in Xcode, the next step is to upload app to Apple App Store through App Store Connect. At this stage, your app build is transferred to Apple’s servers for processing before it can be submitted for review.
If you’ve followed the previous steps correctly, the upload process is straightforward.
Upload the App Build
After selecting Distribute App in Xcode:
- Choose App Store Connect.
- Select Upload.
- Confirm the distribution settings.
- Verify your signing certificate.
- Click Upload.
Xcode securely uploads the application to Apple.
Wait for Build Processing
Once uploaded, Apple begins processing your build. Depending on server activity and app size, processing can take anywhere from a few minutes to an hour.
During processing, Apple checks:
- App integrity
- Binary compatibility
- Signing certificates
- Metadata synchronization
- Security validation
You can monitor the processing status in App Store Connect.
Verify the Build
After processing is complete:
- Open App Store Connect
- Navigate to My Apps
- Select your application
- Open the current version
Your uploaded build should now be available for selection before submitting the app for review.
Step 7: Complete Your App Store Listing
An attractive App Store listing not only helps users understand your application but also improves discoverability and conversion rates. Before you publish app on App Store, ensure every section is complete and optimized.
App Name
Choose a clear, memorable, and brand-friendly name that reflects your application’s purpose.
Keep it simple and avoid keyword stuffing.
Subtitle
The subtitle appears beneath your app name and briefly describes your application’s primary benefit.
Example:
“Smart Expense Tracking for Small Businesses”
App Description
Write a compelling description that explains:
- What your app does
- Key features
- Benefits
- Target audience
- Why users should download it
Use short paragraphs and bullet points for readability.
Keywords
Apple allows developers to enter keywords separately from the description.
Choose keywords users are likely to search for, such as:
- productivity
- finance
- education
- shopping
- booking
Conduct keyword research before submission to maximize visibility.
Screenshots
Screenshots are one of the most influential elements of your App Store listing.
Include high-quality images showcasing:
- Home screen
- Dashboard
- Important features
- User interface
- Key workflows
Use screenshots that clearly demonstrate your app’s value.
App Preview Video (Optional)
Preview videos allow users to see your application in action before downloading.
A short, engaging video highlighting major features can significantly improve conversion rates.
App Icon
Your app icon should:
- Represent your brand
- Be visually appealing
- Follow Apple’s Human Interface Guidelines
- Maintain clarity across different screen sizes
A strong icon creates a positive first impression.
Support URL
Provide a webpage where users can:
- Contact customer support
- Report issues
- Access FAQs
- Learn more about your services
Marketing URL
If your business has a product website, include it to provide users with additional information about your application.
Privacy Policy URL
Most apps are required to include a Privacy Policy explaining:
- Data collection
- Data usage
- Data storage
- User rights
- Security practices
Apple places significant emphasis on user privacy, making this an essential part of the App Store submission process.
Step 8: Complete App Privacy & Compliance Information
Privacy has become a major focus for Apple. Before submitting your application, you’ll need to answer several questions about your app’s data collection practices.
App Privacy
Apple asks developers to disclose whether the app collects information such as:
- Contact information
- Location
- Health data
- Financial information
- Browsing history
- Purchases
- Usage analytics
Provide accurate responses to avoid delays during review.
App Tracking Transparency (ATT)
If your application tracks users across apps or websites, you must implement Apple’s App Tracking Transparency (ATT) framework.
Users must explicitly grant permission before tracking begins.
Permissions
Only request permissions that are necessary.
Examples include:
- Camera
- Microphone
- Photos
- Contacts
- Notifications
- Location
Each permission request should clearly explain why access is required.
Encryption Declaration
If your application uses encryption technologies, Apple may ask additional compliance questions during submission.
Answer these accurately based on your app’s functionality.
Step 9: Submit Your App for Review
After completing your App Store listing and privacy information, you’re ready to submit your application.
Select the Uploaded Build
Inside App Store Connect:
- Open your app version.
- Select the processed build.
- Attach it to the release.
Complete Remaining Information
Before submission, verify:
- App description
- Keywords
- Screenshots
- Support URL
- Privacy Policy
- Pricing
- Availability
- Age Rating
- App Category
Incomplete metadata is one of the most common reasons submissions are delayed.
Submit the App
Once everything is complete:
Click Submit for Review.
Your app status changes to:
Waiting for Review
Apple’s review team will begin evaluating your application.
Understanding App Review Statuses
During iOS app publishing, you’ll see several status updates in App Store Connect.
Waiting for Review
Your app has been successfully submitted and is waiting in Apple’s review queue.
In Review
Apple reviewers are actively testing your application.
They evaluate:
- Performance
- Functionality
- Security
- Privacy
- Metadata
- Compliance with App Store Review Guidelines
Pending Developer Release
If you selected manual release, your app has been approved and is waiting for you to publish it.
Ready for Sale
Congratulations!
Your application is now live on the Apple App Store and available for users to download.
Quick Checklist Before Submission
Before clicking Submit for Review, confirm that you have:
- Uploaded the correct build
- Completed all metadata
- Added high-quality screenshots
- Uploaded your app icon
- Included a Privacy Policy URL
- Verified pricing and availability
- Configured permissions correctly
- Selected the correct app category
- Tested the production build thoroughly
Completing this checklist reduces the risk of delays and improves your chances of approval.
How Long Does Apple Take to Review an App?
After completing the App Store submission, your app enters Apple’s review queue. During this stage, Apple’s review team evaluates your application to ensure it complies with the App Store Review Guidelines, privacy requirements, and security standards.
For most applications, the review process takes 24 to 48 hours. However, review times can vary depending on factors such as:
- App complexity
- Number of features
- Compliance requirements
- App category
- Current App Store review volume
- Whether it’s a new app or an update
Enterprise applications, financial services, healthcare platforms, or apps with advanced integrations may require additional review time.
If Apple needs clarification, you’ll receive a message through App Store Connect explaining what needs to be addressed.
Common Reasons Apple Rejects Apps
Even well-designed applications can be rejected if they don’t meet Apple’s guidelines. Understanding the most common rejection reasons can help you prepare your app more effectively.
1. App Crashes or Performance Issues
Applications that crash, freeze, or contain major bugs are unlikely to pass review.
Before you upload app to Apple App Store, thoroughly test your application on multiple devices and iOS versions.
2. Incomplete App Information
Missing metadata such as screenshots, descriptions, support URLs, or privacy policies can delay or prevent approval.
Always double-check your App Store listing before submission.
3. Privacy Violations
Apple places a strong emphasis on protecting user data.
Common issues include:
- Missing Privacy Policy
- Incorrect privacy disclosures
- Unnecessary permission requests
- Improper handling of personal information
4. Poor User Experience
Applications with confusing navigation, broken layouts, poor responsiveness, or inconsistent design may not meet Apple’s quality expectations.
Focus on delivering a clean, intuitive, and user-friendly interface.
5. Non-Compliance with App Store Guidelines
Apps that violate Apple’s policies regarding content, payments, intellectual property, or functionality may be rejected until the issues are resolved.
Always review the latest App Store Review Guidelines before submitting your app.
Best Practices for Successful iOS App Publishing
Following proven best practices can improve your chances of receiving approval on the first submission.
1. Test Extensively
Perform comprehensive testing across different devices, screen sizes, and supported iOS versions.
2. Optimize Performance
Ensure your app launches quickly, runs smoothly, and uses system resources efficiently.
3. Write High-Quality Metadata
Create a compelling app title, informative description, relevant keywords, and attractive screenshots that accurately represent your application.
4. Follow Apple’s Human Interface Guidelines
Design your app using Apple’s recommended UI patterns to provide a familiar and intuitive user experience.
5. Prioritize Security
Implement secure authentication, encrypted data storage, API protection, and secure communication protocols to safeguard user information.
6. Keep Privacy Information Accurate
Be transparent about how your app collects, stores, and uses data. Accurate privacy disclosures build trust with both Apple and your users.
7. Monitor Feedback After Launch
Once your app is live, monitor user reviews and analytics to identify opportunities for improvement. Regular updates and bug fixes help maintain a positive user experience.
Why Hire an App Development Company?
While individual developers can manage the submission process, partnering with an experienced app development company can save time, reduce errors, and improve the quality of your final product.
Professional development teams understand Apple’s technical requirements and submission guidelines, making the entire iOS app publishing process more efficient.
Benefits of working with an experienced iPhone app development company include:
- End-to-end app development
- UI/UX design expertise
- Native iOS development
- Quality assurance and testing
- App Store compliance support
- App Store submission assistance
- Performance optimization
- Security implementation
- Ongoing maintenance and updates
Whether you’re launching your first mobile application or expanding an existing digital product, an experienced development partner can help streamline the journey from concept to App Store approval.
Frequently Asked Questions
Q. How do I upload an app to the Apple App Store?
To upload an app, enroll in the Apple Developer Program, prepare your application, configure App Store Connect, archive the app using Xcode, upload the build, complete your App Store listing, and submit the app for review.
Q. How much does it cost to publish an app on the Apple App Store?
Apple requires an annual Apple Developer Program membership fee to publish applications. Additional costs depend on app development, design, testing, maintenance, and marketing.
Q. Do I need a Mac to publish an iOS app?
Yes. Xcode, Apple’s official development environment for building and submitting iOS applications, is available only on macOS.
Q. How long does App Store approval take?
Most applications are reviewed within 24–48 hours, although more complex apps may take longer depending on Apple’s review process.
Q. What happens if my app is rejected?
If your app is rejected, Apple provides feedback explaining the issues. You can make the required changes and resubmit your application for review.
Q. Can I update my app after it is published?
Yes. Developers can release updates through App Store Connect to add features, fix bugs, improve performance, and maintain compatibility with the latest iOS versions.
Q. Can I publish an app without coding experience?
Yes. Many businesses partner with an experienced app development company or iPhone app development company to design, develop, test, publish, and maintain their mobile applications.
Conclusion
Learning how to upload app on App Store is an essential step for anyone planning to launch an iOS application. Although Apple’s submission process includes several stages—from enrolling in the Apple Developer Program and preparing your app to configuring App Store Connect and completing the App Store submission—following the correct process can significantly improve your chances of approval.
A successful iOS app publishing journey starts with thorough testing, accurate metadata, compliance with Apple’s privacy and security requirements, and a well-optimized App Store listing. By investing time in preparation, you can avoid common mistakes, reduce review delays, and deliver a high-quality experience to users.
If you’re looking to build and launch a professional iOS application, partnering with a trusted app development company or iPhone app development company can simplify the entire process. From strategy and design to development, testing, App Store submission, and post-launch support, experienced professionals can help you bring your app to market faster and with greater confidence.
Whether you’re launching your first mobile app or expanding your digital business, following this step-by-step guide will help you successfully upload app to Apple App Store and reach millions of users worldwide.
Whether you’re building a new iPhone app or preparing for App Store submission, our experienced team can help. From strategy and UI/UX design to development, testing, and App Store approval, we deliver secure, scalable, and high-performance iOS applications tailored to your business goals.
Contact us today to turn your app idea into a successful App Store launch.